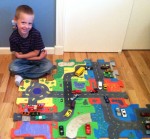
As I’m sure you know in previous posts, my son loves playing with cars. He loves lining them up and “obeying the rules of the road.” He likes drawing and making roads for his cars to drive on. I’ve always wanted to create a road system where he can create an infinite number of road configurations. I imagined it like an interlocking puzzle that had roads and city elements. Since I like working with wood, I just assumed that’s how it would be made. The only thing holding me back would be the precise nature of cutting each segment perfectly so the pieces would fit, no matter how it was arranged. I’m far from a perfect cutter, so the idea would remain in the back of my mind.
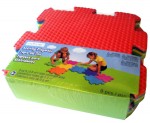
I was walking through Michaels the other day and came across a puzzle mat made of foam (the same material as craft foam). It can interlock, no matter the configuration. That’s when I had my “Ah Ha!” moment. I can simply paint my roads on this material and give my son the road system I’ve always wanted!
It turned out that it was really easy to make. The first step was to make sure that all the roads would follow some basic rules so the roads connect no matter which way you turn the tiles. Each tile had four sides, which means four possible entrances/exits. I stacked all my tiles so they lined up perfectly and marked the side of each tile where the road will enter/exit. This was my base pattern. From here, I can decide on each tile where a road would go. Sometimes I’d use all four points, others I’d only use two. Some roads would curve and connect adjacent sides while other roads would fork. As long as I stuck with the system, all the tiles would connect to eachother to complete roads. For the points that I didn’t have a road going through, I turned it into a dead end with barricades (my son loves dead ends).
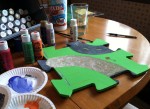
 I got my son involved, he’d tell me what to put in and I’d paint it in for him. We both had a blast and he was very anxious to try out his new roads.I simply painted on the roads with craft paint. No prep work, no top coat, just paint. I’d add in trees, bushes, flowers, lakes and rivers . I didn’t want to get too finicky with the detail. I free-handed everything, used quick brush strokes and didn’t labor over the color. In fact, I opted to mix most of my colors instead of using pure pigment to give variation and add to that “hand-made” look. I like it better that way, but beauty is in the eye of the beholder.
It took awhile to paint. I didn’t get too concerned about making it perfect. All he cared about was having a place to drive his cars. In the end, he got an amazing toy with endless possibilities to stimulate his imagination. I can assure you, he’s going to have more fun with this than anything you can buy in a store.


